どうも、白夜霧(@KiRi_Byakuya)です。
今回は、以前下記記事で紹介したWSL上で構築した「WordPress」の動作がなんかおかしい、という状況が発生。
[st-card myclass=”” id=”17844″ label=”” pc_height=”” name=”” bgcolor=”” color=”” fontawesome=”” readmore=”on” thumbnail=”on” type=””]
異様にアクセスが遅い、というかWordpress上でエラー吐きまくり。
とりあえずUbuntu側をアプデ(apt update)を実行してみようとしたら、下記のようなエラーが発生。
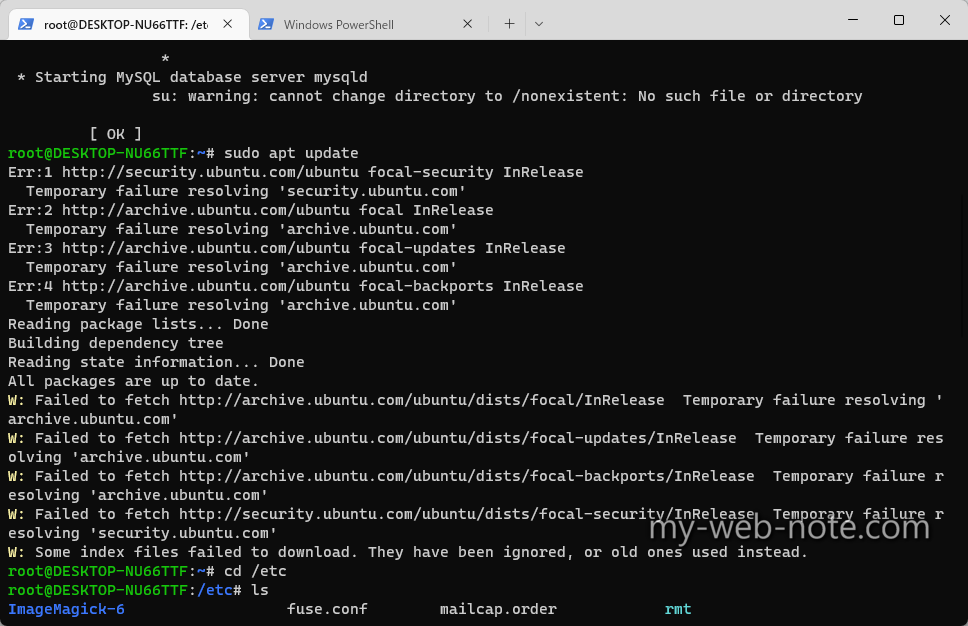
今回は表題の通り『Temporary failure resolving』が発生した場合の解決方法の覚書です。
今回のエラーを解決したらWPももとに戻りました。
『Temporary failure resolving』エラーが発生したWSLの開発環境

wsl --status
既定のディストリビューション: Ubuntu
既定のバージョン: 2
WSL バージョン: 0.66.2.0
カーネル バージョン: 5.15.57.1
WSLg バージョン: 1.0.42
MSRDC バージョン: 1.2.3401
Direct3D バージョン: 1.606.4
DXCore バージョン: 10.0.25131.1002-220531-1700.rs-onecore-base2-hyp
Windowsバージョン: 10.0.22621.608
cat /etc/lsb-release
DISTRIB_ID=Ubuntu
DISTRIB_RELEASE=20.04
DISTRIB_CODENAME=focal
DISTRIB_DESCRIPTION="Ubuntu 20.04.5 LTS"
発生したエラーの内容
sudo apt update
Err:1 http://archive.ubuntu.com/ubuntu bionic InRelease
   Temporary failure resolving 'archive.ubuntu.com'
Err:2 http://security.ubuntu.com/ubuntu bionic-security InRelease
   Temporary failure resolving 'security.ubuntu.com'
Err:3 http://archive.ubuntu.com/ubuntu bionic-updates InRelease
   Temporary failure resolving 'archive.ubuntu.com'
Err:4 http://archive.ubuntu.com/ubuntu bionic-backports InRelease
   Temporary failure resolving 'archive.ubuntu.com' Reading package lists... Done
Reading package lists... Done
Building dependency tree
Reading state information... Done
All packages are up to date.
W: Failed to fetch http://archive.ubuntu.com/ubuntu/dists/bionic/InRelease  Temporary failure resolving 'archive.ubuntu.com'
W: Failed to fetch http://archive.ubuntu.com/ubuntu/dists/bionic-updates/InRelease  Temporary failure resolving 'archive.ubuntu.com'
W: Failed to fetch http://archive.ubuntu.com/ubuntu/dists/bionic-backports/InRelease  Temporary failure resolving 'archive.ubuntu.com'
W: Failed to fetch http://security.ubuntu.com/ubuntu/dists/bionic-security/InRelease  Temporary failure resolving 'security.ubuntu.com'
W: Some index files failed to download. They have been ignored, or old ones used instead.
Ubuntuで「apt update」実行時の『Temporary failure resolving』の解決方法

そもそもの原因は、DNSの設定がダメ?で、ドメインの解決ができなくなっているらしい。
解決方法としては、DNSをしっかり指定して設定することで『Temporary failure resolving・・・』は解決できる。
[st-mybox title=”簡単な流れ” fontawesome=”fa-list-ol” color=”#757575″ bordercolor=”#f3f3f3″ bgcolor=”” borderwidth=”3″ borderradius=”5″ titleweight=”bold” title_bordercolor=”#757575″ fontsize=”” myclass=”st-mybox-class st-title-under st-list-no” margin=”25px 0 25px 0″]
- 「wsl.conf」に「network」設定を追記
- WSLを再起動
- 「resolv.conf」にDNSの設定を追記
[/st-mybox]
wsl.conf ファイルと .wslconfig ファイルは、すべての WSL 2 ディストリビューション () 全体で、配布ごとに (wsl.conf) グローバルに詳細設定オプションを構成するために使用されます.wslconfig。 このガイドでは、各ファイルの種類、ファイルの保存場所、サンプル設定ファイル、ヒントを使用する各設定オプションについて説明します。
①「wsl.conf」に「network」設定を追記
ターミナルからubuntuにログインして「wsl.conf」を開く。
sudo nano /etc/wsl.conf
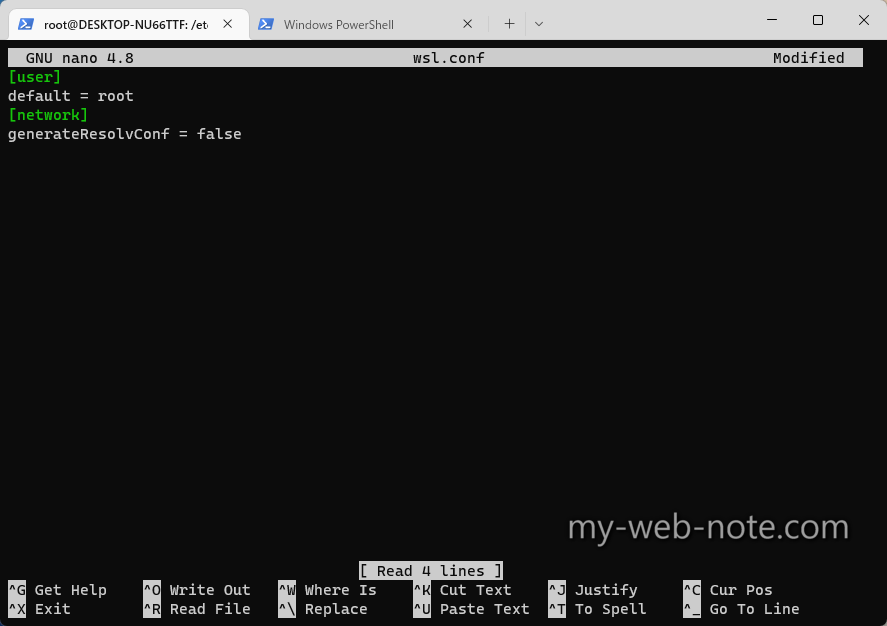
wsl.confに「network」設定追記
[network]
generateResolvConf = false
[st-cmemo fontawesome=”fa-bookmark” iconcolor=”#BDBDBD” bgcolor=”#fafafa” color=”#757575″ bordercolor=”” borderwidth=”” iconsize=””]
「generateResolvConf」
true にすると、/etc/resolv.conf を生成するように WSL を設定します。 resolv.conf には、指定されたホスト名をその IP アドレスに解決できる DNS リストが含まれています。
[/st-cmemo]
②WSLのディストリビューションを再起動
ubuntuからログアウトして、WSLを再起動。
wsl --shutdown
[st-cmemo fontawesome=”fa-exclamation-circle” iconcolor=”#ef5350″ bgcolor=”#ffebee” color=”#000000″ bordercolor=”” borderwidth=”” iconsize=””]
ここで再起動しないと「resolv.conf」が自動生成されて「resolv.conf」への変更がキャンセル(初期化)されるので再起動は必須です。
[/st-cmemo]
※自動生成された「resolv.conf」には下記のように記載されています。
# This file was automatically generated by WSL. To stop automatic generation of this file, add the following entry to /etc/wsl.conf:
# [network]
# generateResolvConf = false
※直訳
# このファイルは、WSLによって自動的に生成されたものです。このファイルの自動生成を停止するには、/etc/wsl.conf に以下のエントリを追加してください。
# [network]
# generateResolvConf = false
③「resolv.conf」にDNSの設定を追記
ubuntuに再ログインして「resolv.conf」を開く。
sudo nano /etc/resolv.conf
[st-cmemo fontawesome=”st-svg-bigginer_l” iconcolor=”#9CCC65″ bgcolor=”#F1F8E9″ color=”#000000″ bordercolor=”” borderwidth=”” iconsize=””]
①で自動生成を無効にしているので「resolv.conf」は新規作成になります。
[/st-cmemo]
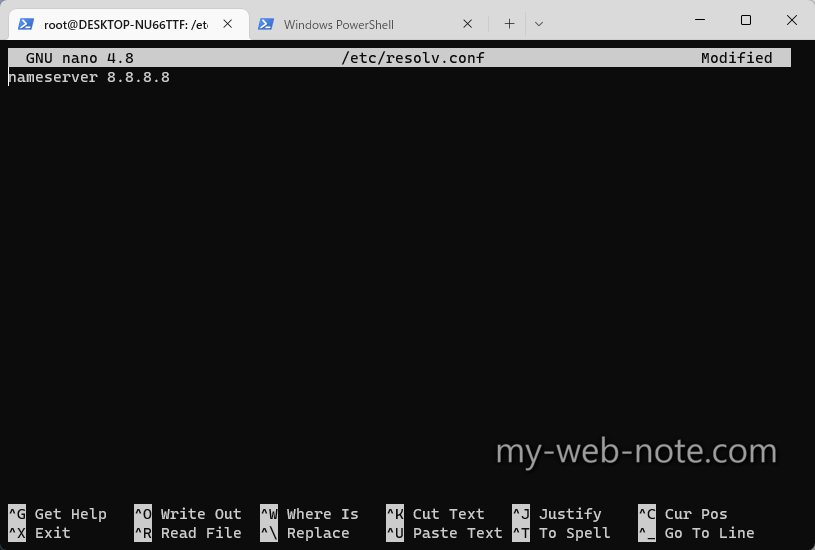
「resolv.conf」に任意のDNSサーバーを追記して保存。
nameserver xxx.xxx.xxx.xxx
私はとりあえずGoogleのDNSサーバーに設定しました。
[st-cmemo fontawesome=”fa-comments” iconcolor=”#F48FB1″ bgcolor=”#FCE4EC” color=”#000000″ bordercolor=”” borderwidth=”” iconsize=””]
あくまでローカルの開発環境なので、特別指定がなければ「GoogleのDNS(8.8.8.8)」か、WSLが動いているPCが使っているDNS(ipconfig /allで確認)を指定すればOKだと思います。
[/st-cmemo]
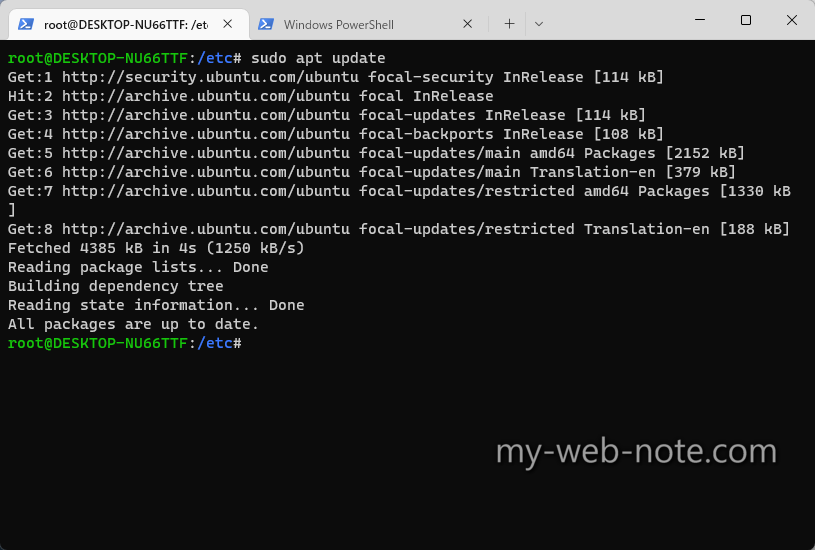
「apt update」を実行してみると正常に完了したことが確認できました。
以上、ありがとうございましたm(_ _)m



コメント
同じ問題が発生しこちらのページのとおりに実施し解決することができました。
ありがとうございました!