どうも、白夜霧(@KiRi_Byakuya)です。
今回は、MicrochipのPICマイコンを開発するための開発環境「MPLAB X IDE」のインストール方法。
かつ、専用のコンパイラの「MPLAB XC Compilers」と開発が楽になる便利ツール「MPLAB Code Configurator」のインストール方法覚書。
「MPLAB X IDE」インストール方法
1.インストーラをダウンロード
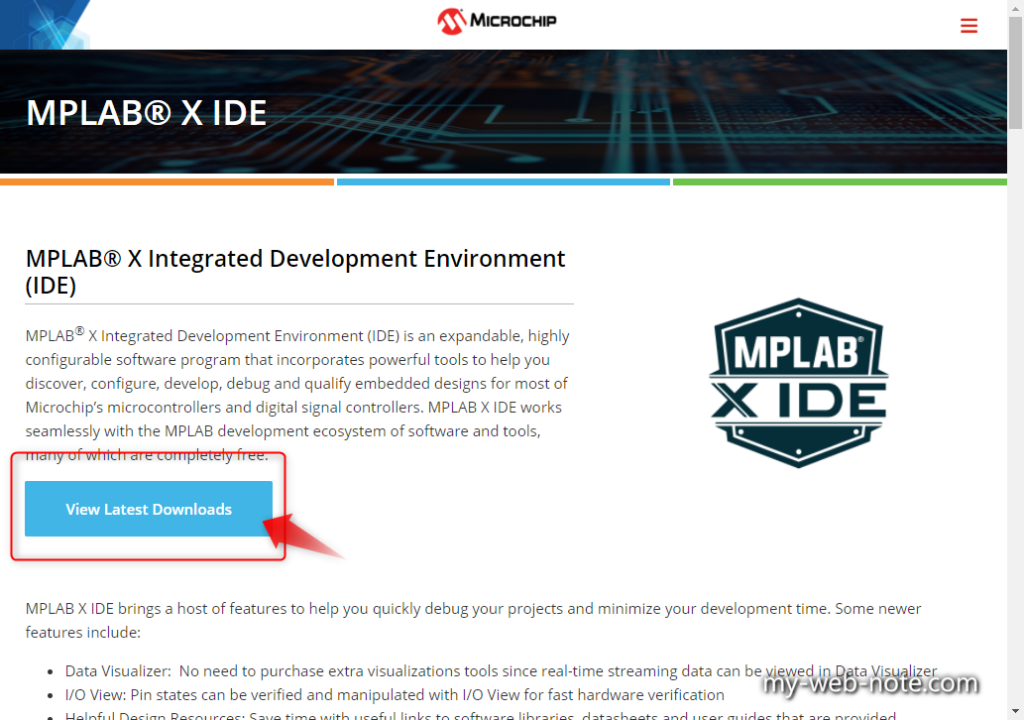
「MPLAB® X Integrated Development Environment (IDE)」にアクセスして「View Latest Downloads」をクリック。
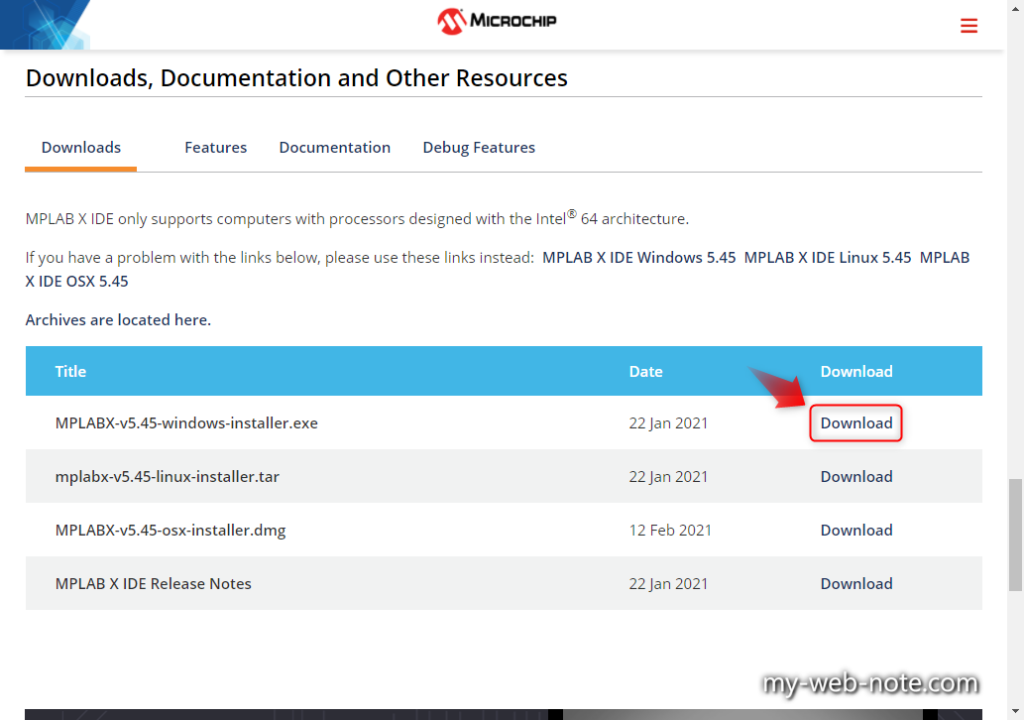
「Downlads」から指定OS用のインストーラをDLする。
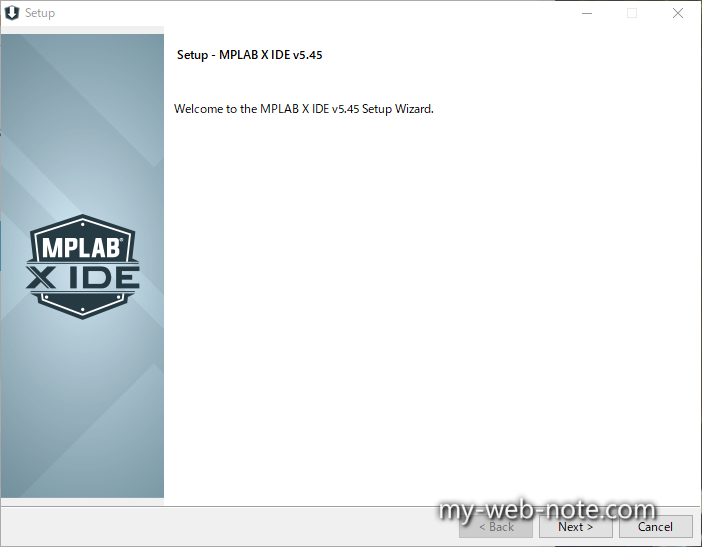
2.Setup – MPLAB X IDE
DLした「MPLABX-v5.45-windows-installer.exe」を起動して「Next」。
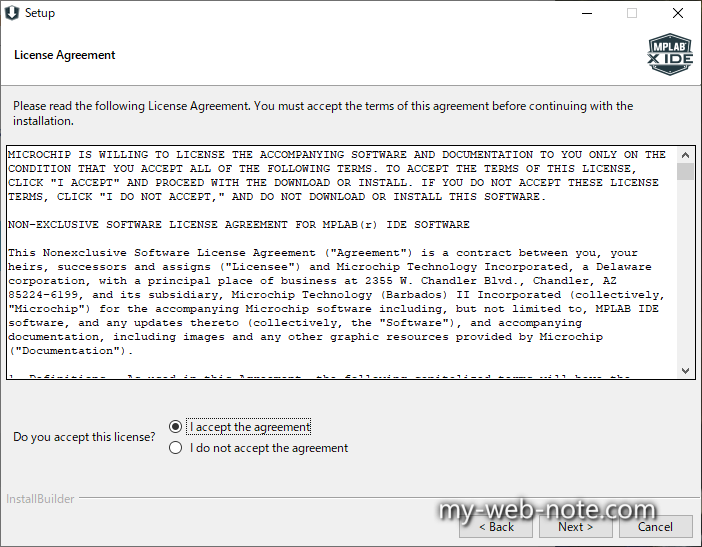
3.License Agreement
「I accept the agreement」を選択して「Next」。
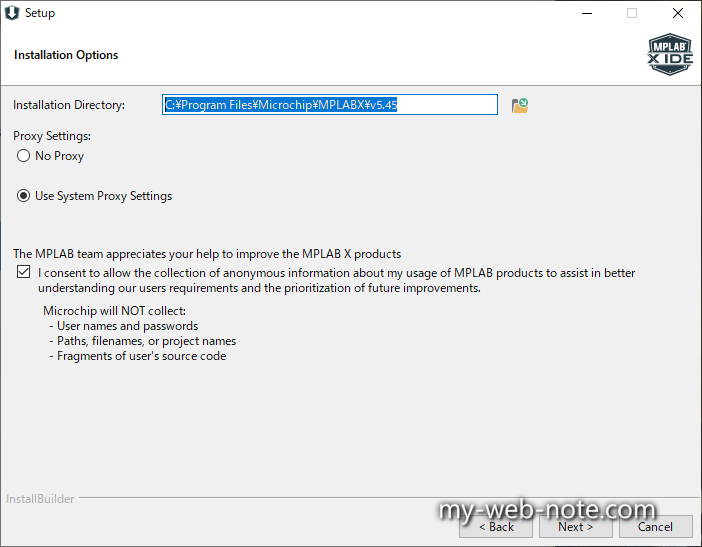
4.Installation Options
インストール先とプロシキー設定。基本はデフォルトでOK。
「The MPLAB team appreciates your help to improve the MPLAB X produsts」は、よくある「製品改善のため匿名情報収集の許可」の有無。ここはご自由に。
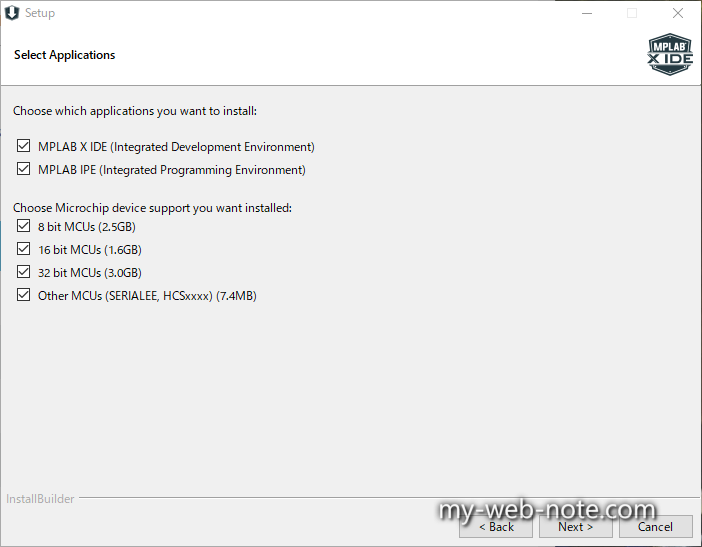
5.Select Applications
インストールするアプリケーションの選択。「MPLAB X IDE」と「MPLAB IPE」は両方チェック。「device support」は使う予定のMCUを選択。
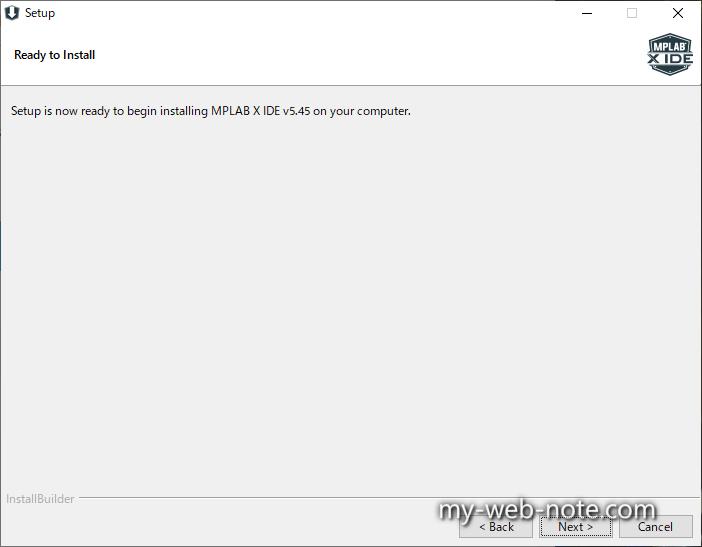
6.Ready to Install
「Next」をクリック。
7.Installing
インストール中の画面。
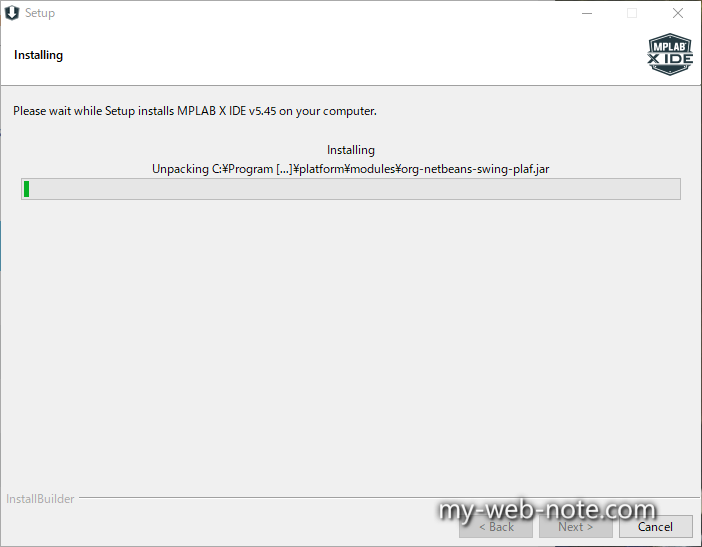
途中で「このデバイス ソフトウェアをインストールしますか?」が表示されるので「“Microchip Technology Incorporated”からのソフトウェアを常に信頼する(A)」にチェックを入れて「インストール」を押す。

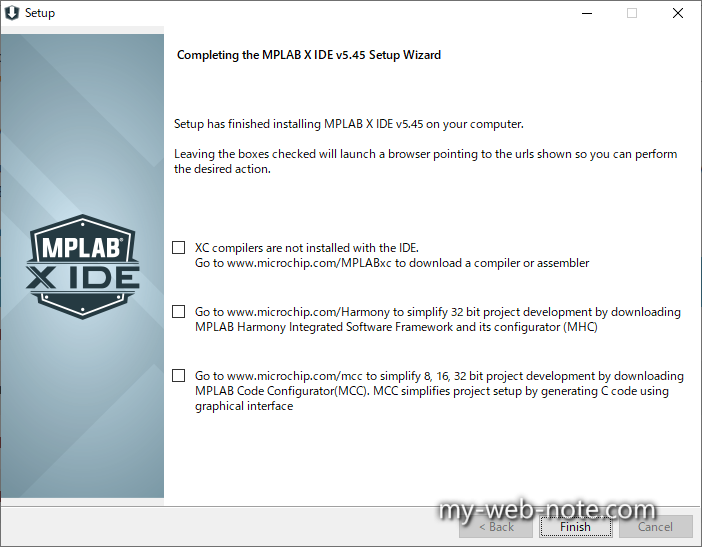
8.Completing the MPLAB X IDE Setup Wizard
インストール完了。チェックボックスは全部外してOK。「Finish」をクリックで完了。
[st-cmemo fontawesome=”fa-file-text-o” iconcolor=”#919191″ bgcolor=”#fafafa” color=”#000000″ bordercolor=”” borderwidth=”” iconsize=””]
このあとコンパイラをインストールする必要があるので「XC compilers are not installed with the IDE.」はチェックしておいてもOK。
※やった後に気付いた(´・ω・`;)
[/st-cmemo]
「MPLAB XC Compilers」インストール方法
1.コンパイラをダウンロード
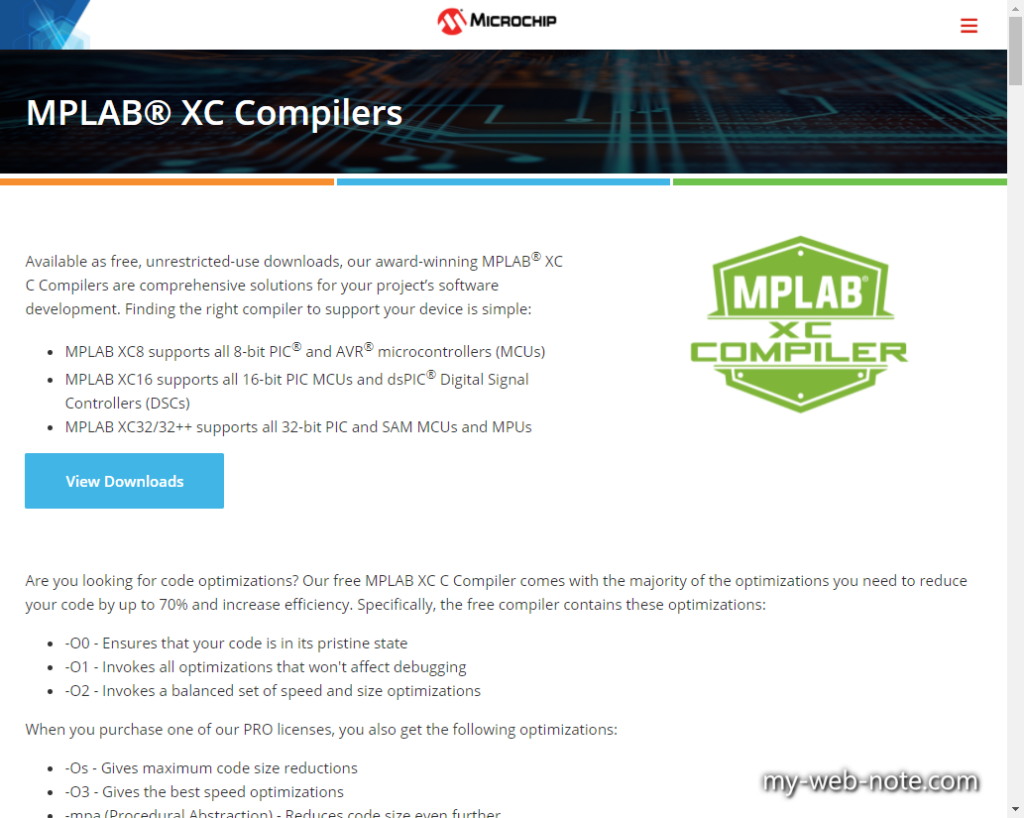
「MPLAB XC Compilers」を開いて「View Downloads」をクリック。
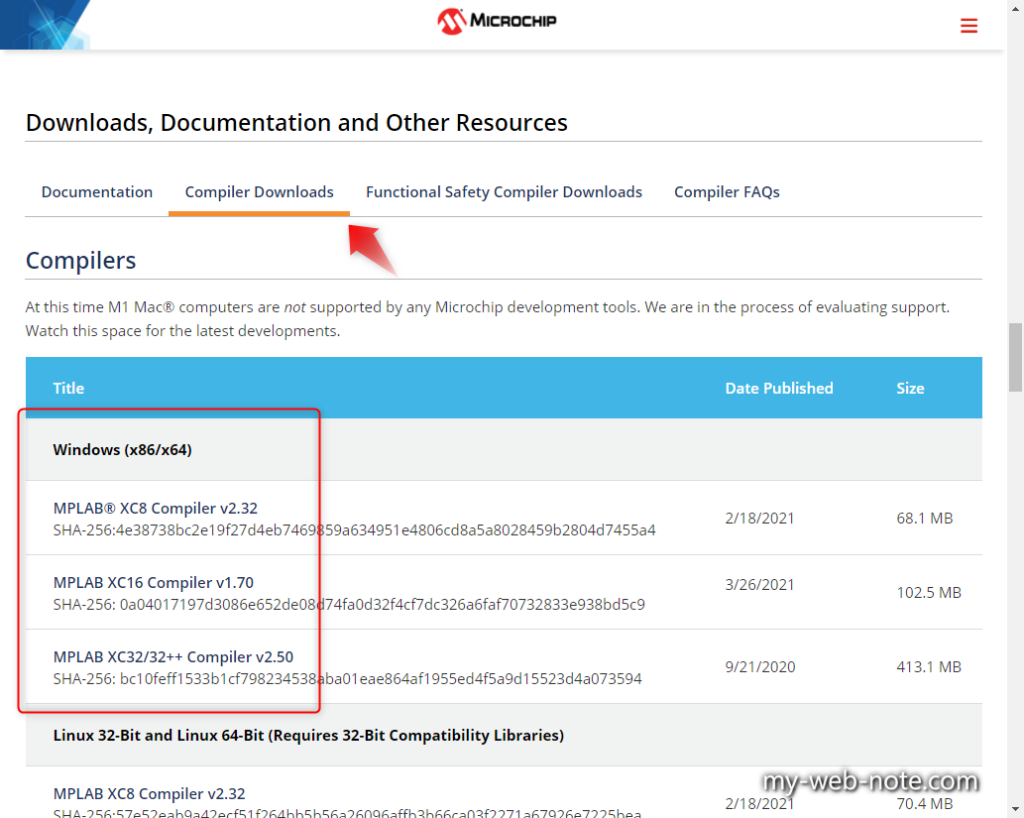
使用するコンパイラを選択してダウンロードする。
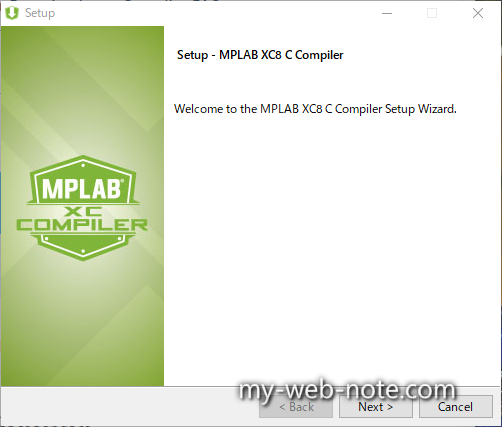
2.Setup – MPLAB XC8 C Compiler
ダウンロードしたインストーラーを起動して「Next」。
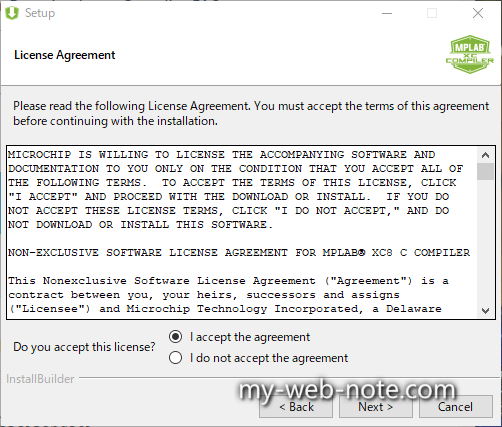
3.License Agreement
「I accept the agreement」を選択して「Next」。
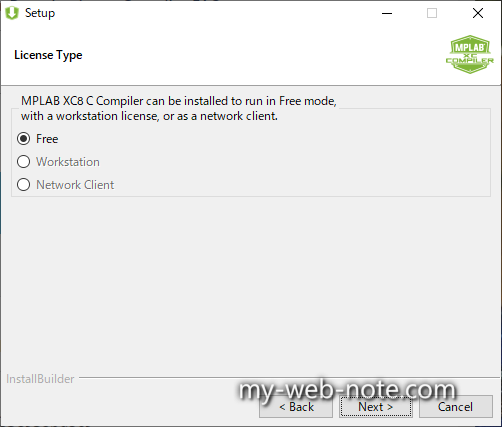
4.License Key
フリーエディション(無料)を使用するので、そのまま「Next」。
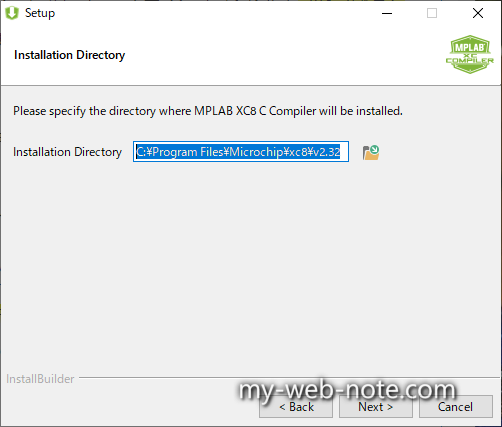
5.Installation Directory
インストール先フォルダの選択。デフォルト推奨。
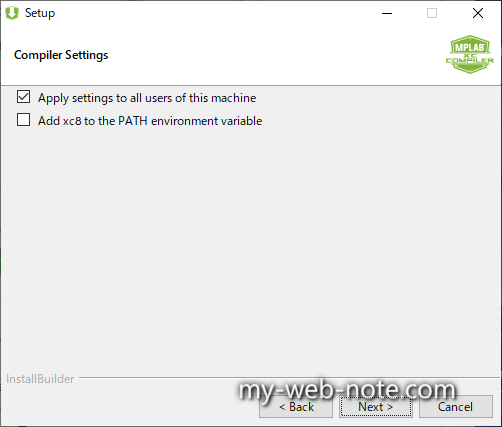
6.Compiler Settings
「Apply settings to all users of this machine」(このコンピューターのすべてのユーザーに設定を適用する)にチェック。PATHの設定はご自由に。
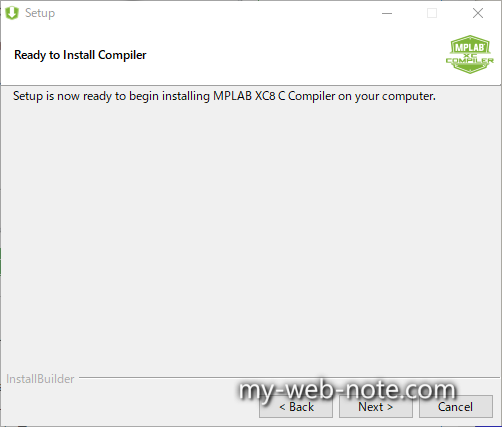
7.Ready to Install Compiler
そのまま「Next」。
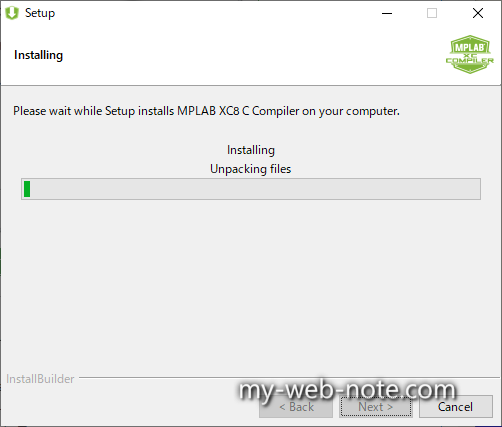
8.Installing
インストール画面。
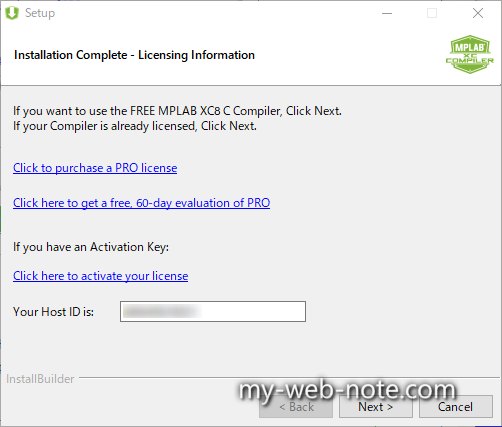
9.Installation Complete – Licensing Infomation
ライセンスの選択画面。無料ライセンスを使うので、そのまま「Next」。
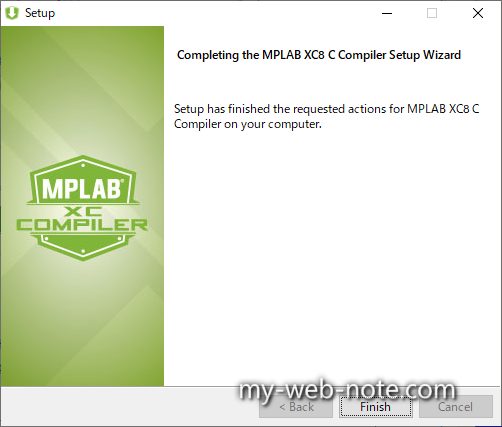
10.Completing the MPLAB XC8 C Compiler Setup Wizard
インストール完了画面。「Finish」で終了。
「MPLAB XC Compilers」インストール確認方法
コンパイラのインストールが完了したら「MPLAB X IDE」を起動して「Tools」→「Options」をクリック。
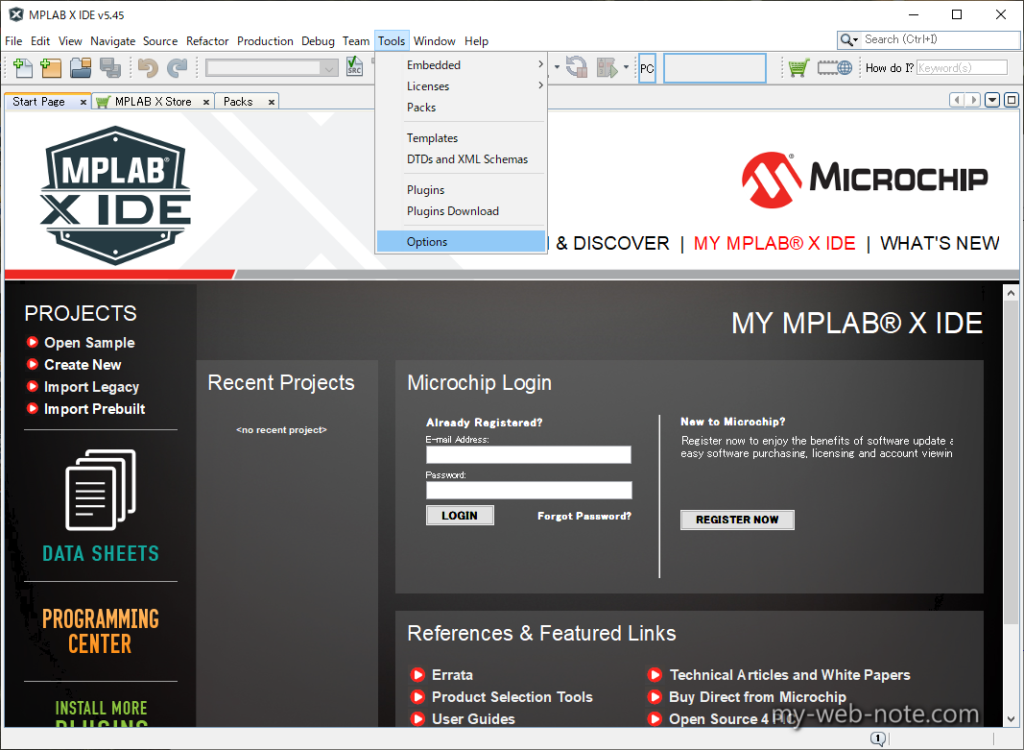
「Embedded」→「Build Tools」の「Toolchain」にインストールしたコンパイラがあればインストール成功。

「MPLAB Code Configurator」のインストール方法

「MPLAB X IDE」を使って開発する場合、MPLAB Code Configurator(以下:MCC)があると便利。
というか、これがないとMicrochip固有のライブラリを導入できない。
初めて「AVR-IOT WG」を使ってWifi関係のサンプルを作ろうとした時、ライブラリーをどうやって入手すればいいのかわからず苦戦した・・・。
もっと初心者(日本人)に優しくしてくれ・・・(;´Д`)
1.IDEからプラグインをインストール。
「MPLAB X IDE」を起動して「Tools」→「Plugins」をクリック。

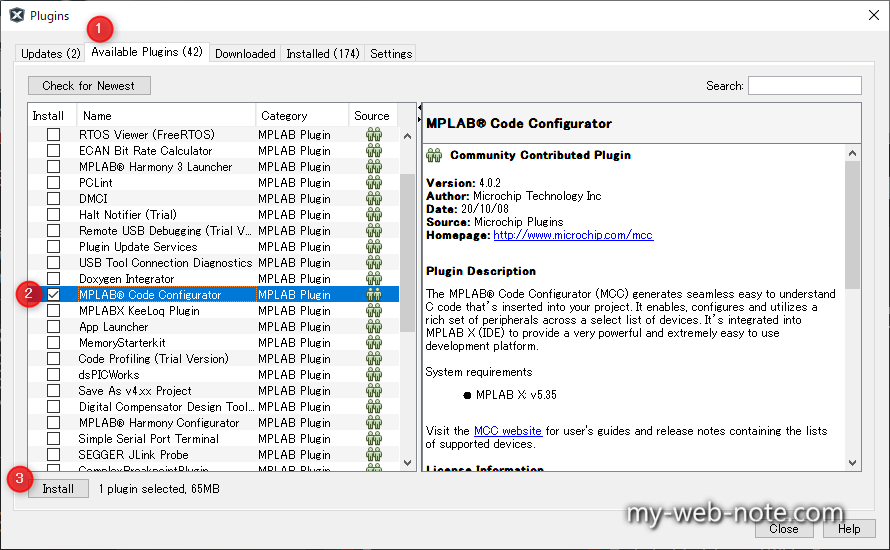
2.「MPLAB Code Configurator」を選択する。
「Available Plugins」から「MPLAB Code Configurator」にチェックを入れて、左下の「Install」をクリック。
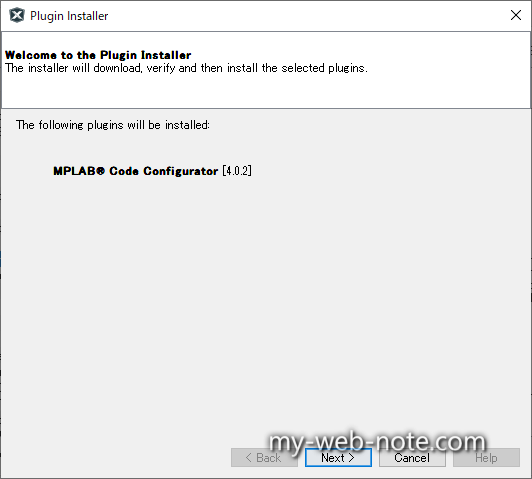
3.Welcome to the Plugin Installer
そのまま「Next」。
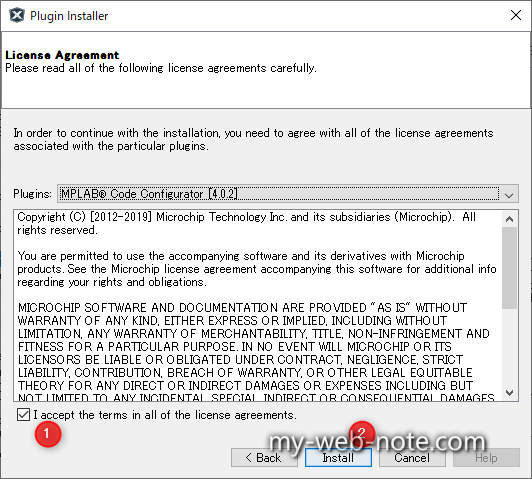
4.License Agreement
「I accept the terms in all of the license agreements.」にチェックを入れて「Install」をクリック。
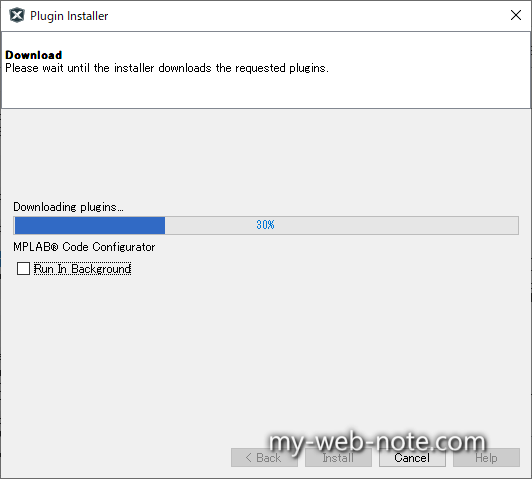
5.Download
ダウンロード画面。
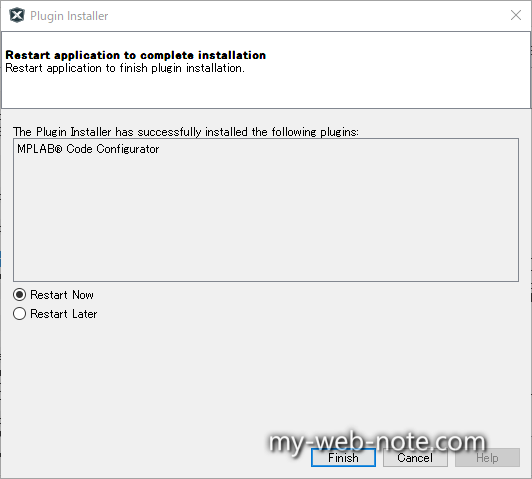
6.Restart application to complate installation
インストール完了。アプリ(IDE)の再起動をすぐに実行するか、後で実行するか選択(Restart Now / Restart Later)。基本は「Restart Now」を推奨。
「MPLAB Code Configurator」(MCC)起動方法
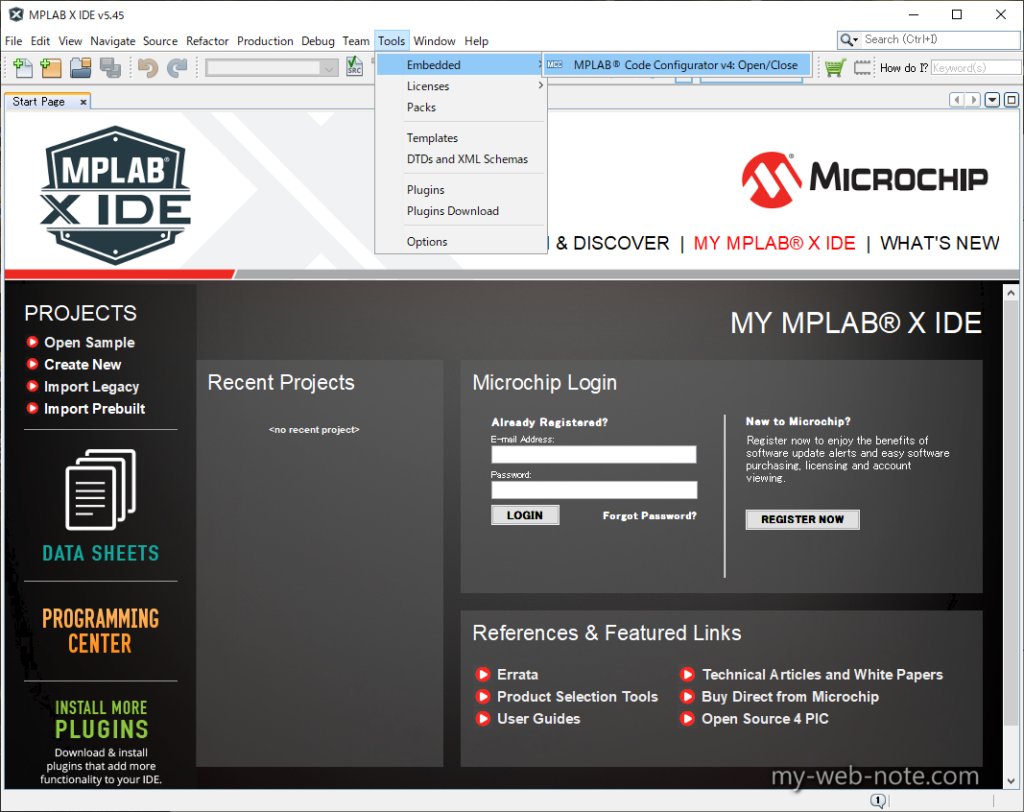
「MPLAB X IDE」を起動して「Tools」→「Embedded」で「MPLAB Code Configurator Open/Close」をクリックすれば起動できる。停止も同じ。
参考になったらポッチとお願いしますm(_ _)m

![]()
![]()
![]()


コメント